C/C++ Extension pack 설치 :
https://marketplace.visualstudio.com/items?itemName=ms-vscode.cpptools-extension-pack
C/C++ Extension Pack - Visual Studio Marketplace
Extension for Visual Studio Code - Popular extensions for C++ development in Visual Studio Code.
marketplace.visualstudio.com
Makefile Extention 설치 :
https://marketplace.visualstudio.com/items?itemName=ms-vscode.makefile-tools
Makefile Tools - Visual Studio Marketplace
Extension for Visual Studio Code - Provide makefile support in VS Code: C/C++ IntelliSense, build, debug/run.
marketplace.visualstudio.com
command + Shift + p 로 명령 팔레트 실행
검색어에 makefile 입력.

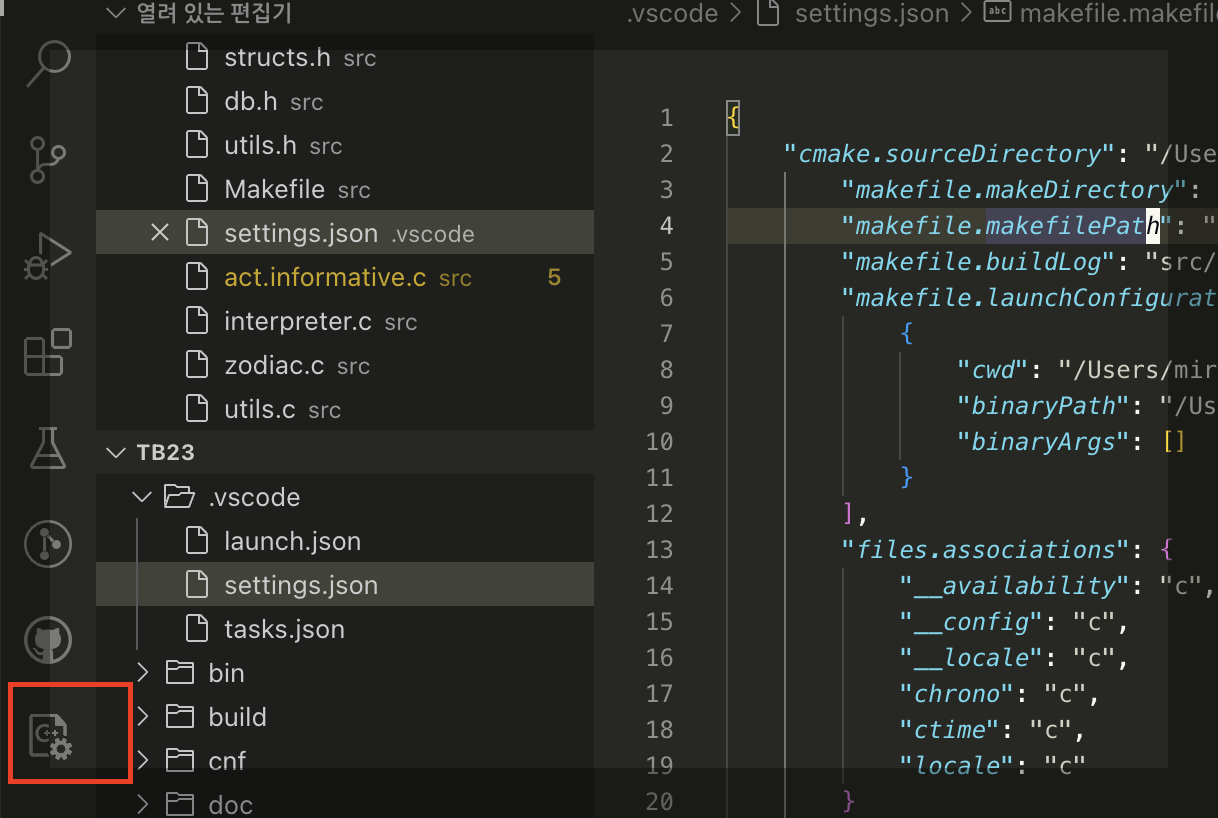
메이크파일 구성 선택. 이러면 자동으로 .vscode 라는 디렉토리에 settings.json 파일이 생성된다.
나머진 해당 파일을 열어 직접 편집해주도록 하자.

아래와 같이 만들면 된다.
"makefile 이라고 입력하면 자동완성 및 auto search 기능이 있어 쉽다.
        "makefile.makeDirectory": "src",
        "makefile.makefilePath": "src",
"makefile.buildLog": "src/",| makefile.makeDirectory | Source 가 들어있는 디렉토리 경로 (-C 옵션으로 사용될 위치) |
| makefilePath | 메이크파일이 작성될 경로. |
| buildlog | build 에 대한 로그 경로. |
Makefile 도 작성해 준다. 아래는 내가 사용하는 예제
# C compiler to use
CC = /opt/homebrew/bin/gcc-13

# Any special flags you want to pass to the compiler
MYFLAGS = -Wall -Wno-char-subscripts -Wno-unused-but-set-variable

BINDIR = ../bin

CFLAGS = -g -O2 $(MYFLAGS) $(PROFILE) -Wall

SRCFILES := act.comm.c act.informative.c act.item.c act.movement.c  \
 asciimap.c ban.c boards.c bsd-snprintf.c castle.c cedit.c class.c  \

OBJFILES := act.comm.o act.informative.o act.item.o act.movement.o \
asciimap.o ban.o boards.o bsd-snprintf.o castle.o cedit.o class.o  \

Default: all

all: .accepted
	$(MAKE) $(BINDIR)/server

clean:
	rm -f *.o depend

# Dependencies for the object files (automagically generated with
# gcc -MM)

depend:
	$(CC) -MM *.c > depend

-include depend
이렇게 설정하면 자동으로 Makefile 이라는 탭이 생성된다.
해당 탭을 클릭해보면,
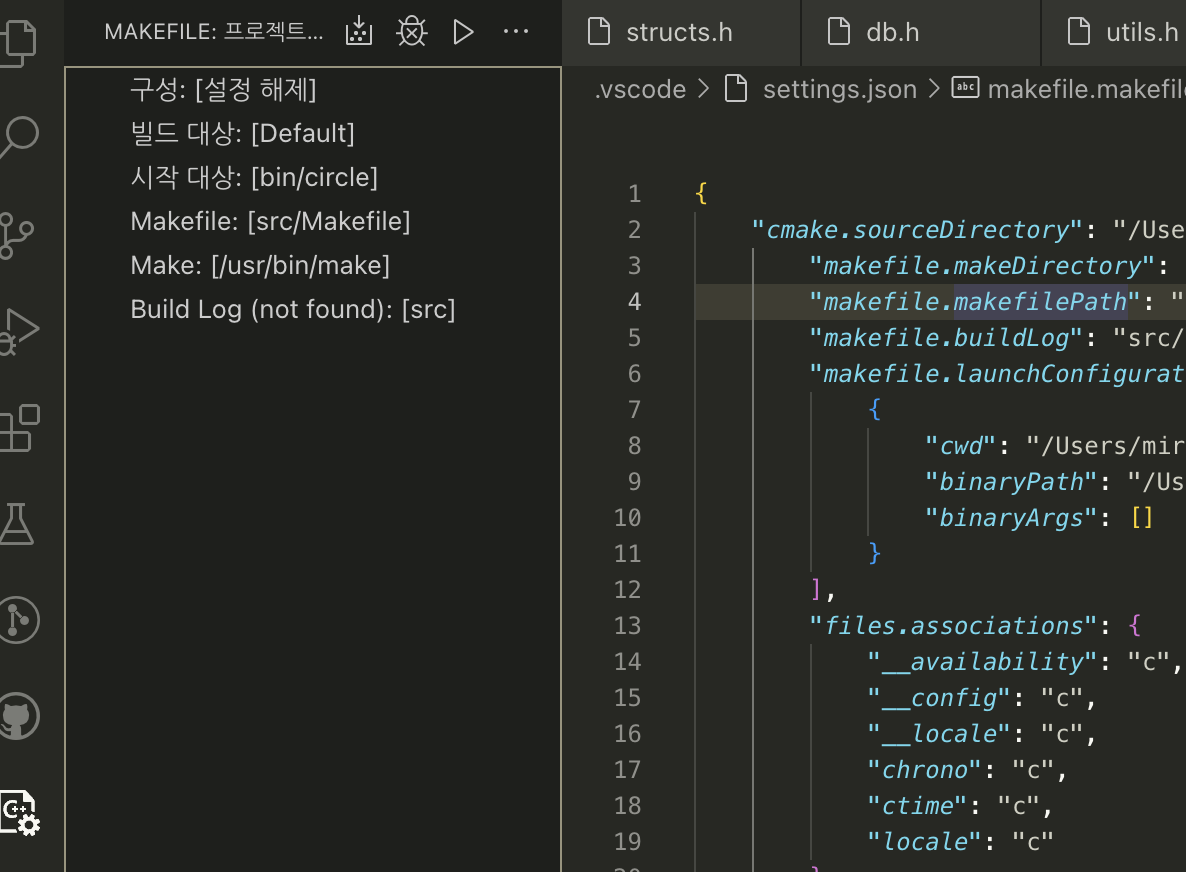
이렇게 또 추가적인 상세 설정을 쉽게 할 수 있다.
다만 종종 꼬이기도 하니 settings.json 을 직접 편집해 주는게 더 낫다. ( 특히 맥에서 ㅠㅠ )
이제 코드 수정 후, 저 위에 빌드를 눌러주면 빌드가 잘 되는 것을 확인 할 수 있다.
하지만 디버깅을 위해 옆에 버그를 눌러보면 실패한다. 추가 설정이 필요하기 때문이다.
settings.json 을 열고 launchconfigure 를 추가해 주면 된다 :
"makefile.launchConfigurations": [
{
	"cwd": "/Users/mirr/Study/Games/mirr",
    "binaryPath": "/Users/mirr/Study/Games/mirr/bin/server",
    "binaryArgs": []
}
],
cwd : 프로그램의 작업 디렉토리.
binaryPath: 실행 또는 디버그를 위한 이진파일의 경로.
binaryArgs: 프로그램에 필요한 인수.
위 내용을 추가하면 벌레 버튼과 플레이(실행) 버튼을 눌렀을 때 바이너리가 실행되고 디버깅 아웃풋도 생성된다.
디버깅에는 lldb 를 쓰게 된다 ( 맥의 경우 )

참 쉽죠잉~? 근데 이것때문에 하루를 꼬박 삽질한 상태였다는 ㅠㅠ
제작된 바이너리의 변수 변화를 직접 확인해야 하는데 lldb 에서 직접 해당 부분을 확인하는 것이 넘 불편해서
반드시 연결해야만 했다... ㅠㅠ
끝.
'Skills > C/C++' 카테고리의 다른 글
| gcc-error massage collection!!! (0) | 2006.02.13 |
|---|---|
| VC++ 6 에서 잦은 rebuild문제. (0) | 2005.09.08 |
| C 와 C++ 공부를 위한 도서 및 참고사항 (0) | 2005.08.10 |
| Memory Pooling Code 관련 (0) | 2005.06.09 |
| if (1)?? do{}while(0) 에 대해서.. (0) | 2005.06.08 |